Setting up Google Tag Manager in Seidat

Get more out of your presentation analytics by connecting Google Tag Manager.
The Google Tag Manager (GTM) integration lets you install third-party analytics tags to Seidat. If you want to add Google Analytics 4 to your Seidat, go here. These instructions are for GTM in general, and other analytics tools than Google Analytics 4.
Don't have a Google Tag Manager account?
Follow these steps to create a Google Tag Manager account and container:
Sign up for Google Tag Manager for free at tagmanager.google.com.
Click Create Account in the top-right corner.
Fill in the account details.
Enter a descriptive container name and choose Web as the target platform.
Click Create.
Already have a Google Tag Manager account?
You can use your existing GTM container in Seidat. If you'd like to control what tags fire on Seidat slides, see "Creating a custom trigger" below for instructions.
If you'd still like to create a separate container, follow these steps:
Switch to the Admin view by clicking Admin near the top of the screen.
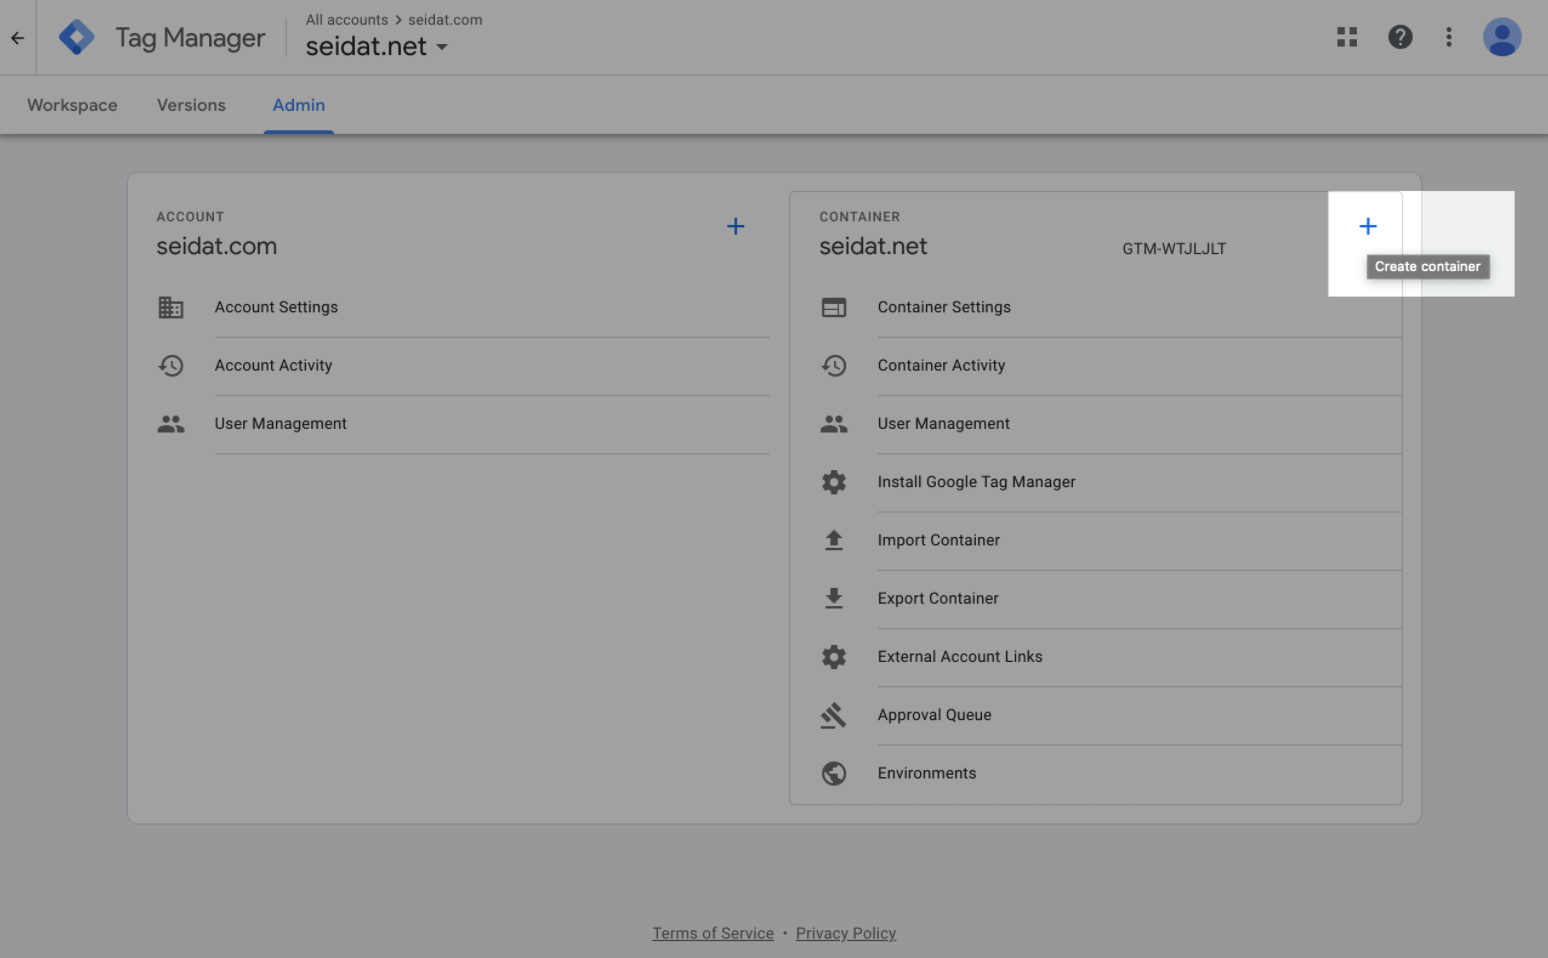
Click + (plus icon) next to the existing container's ID. (See image 1.)
Enter a descriptive container name and choose Web as the target platform.
Click Create.
Image 1. Creating a new container.
Adding your Google Tag Manager container ID to Seidat
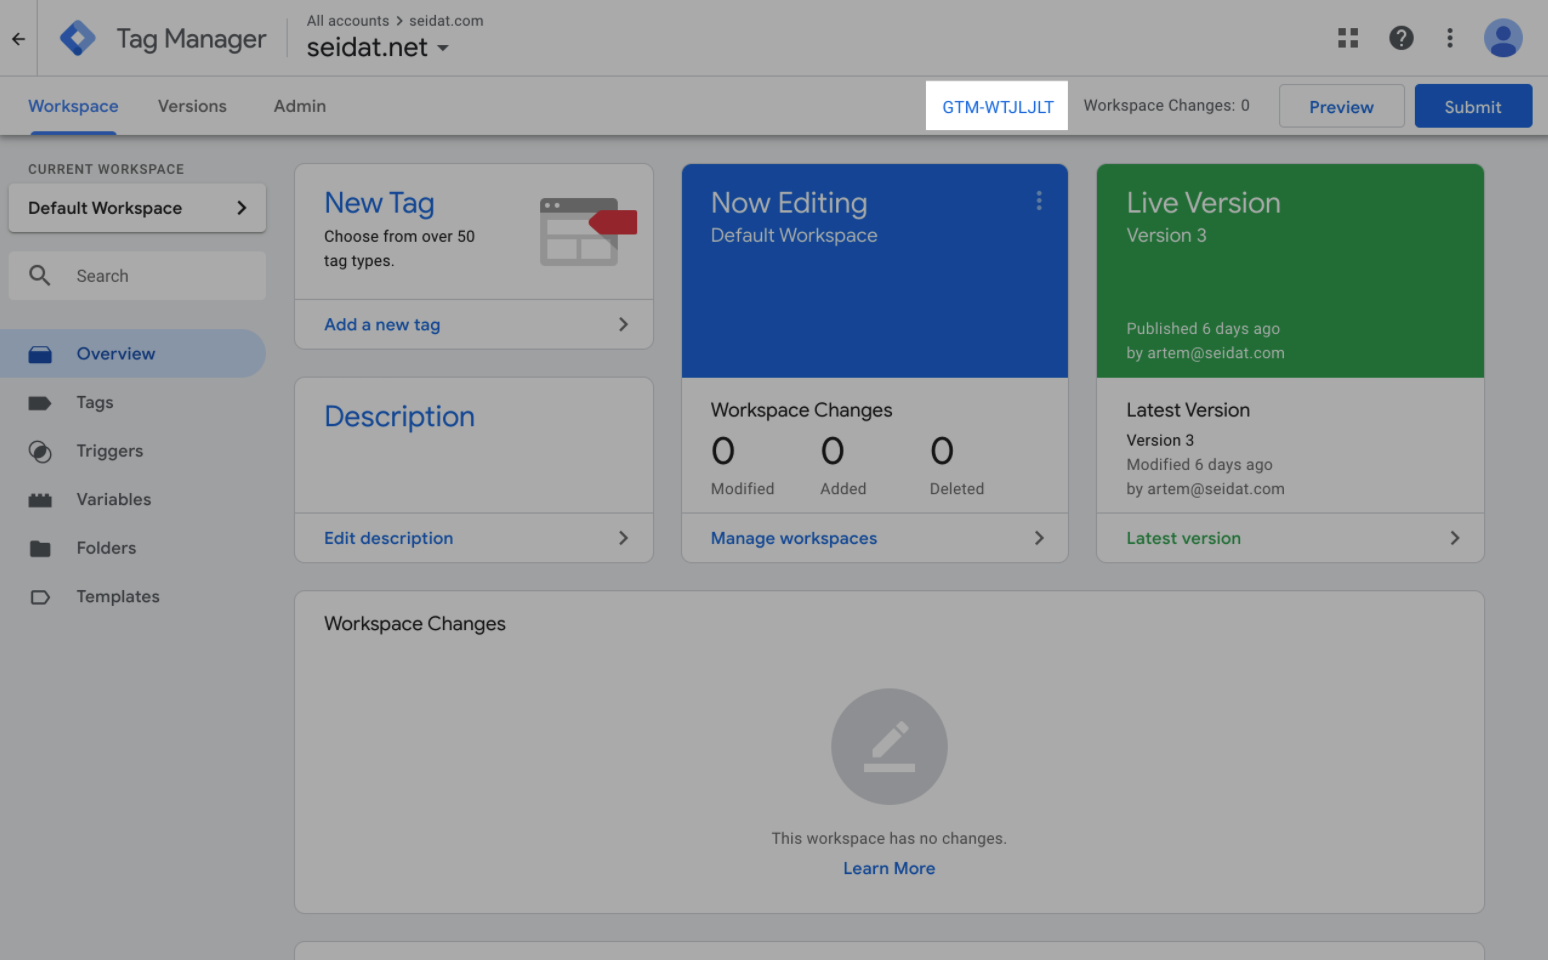
To enable Google Tag Manager in your team, you will need to provide your container ID on the Settings page. The container ID consists of "GTM" followed by random uppercase letters and digits, for example GTM-WTJLJLT
Image 2. Adding Container ID

Can't find your container ID?
You can find the container ID at the top of the Workspace view.
Image 3. Container ID location
Continue with these instructions if you want to add Leadfeeder Tracker to Seidat through GTM. If you want to add Google Analytics 4 to your Seidat, go here.
Creating a custom HTML tag
These instructions describe how to add Leadfeeder Tracker to Seidat through GTM:
Switch to the Workspace view by clicking Workspace near the top of the screen.
Click Tags in the sidebar on the left.
Click New in the top-right corner.
Name the tag in the top-left corner (e.g. Leadfeeder Tracker).
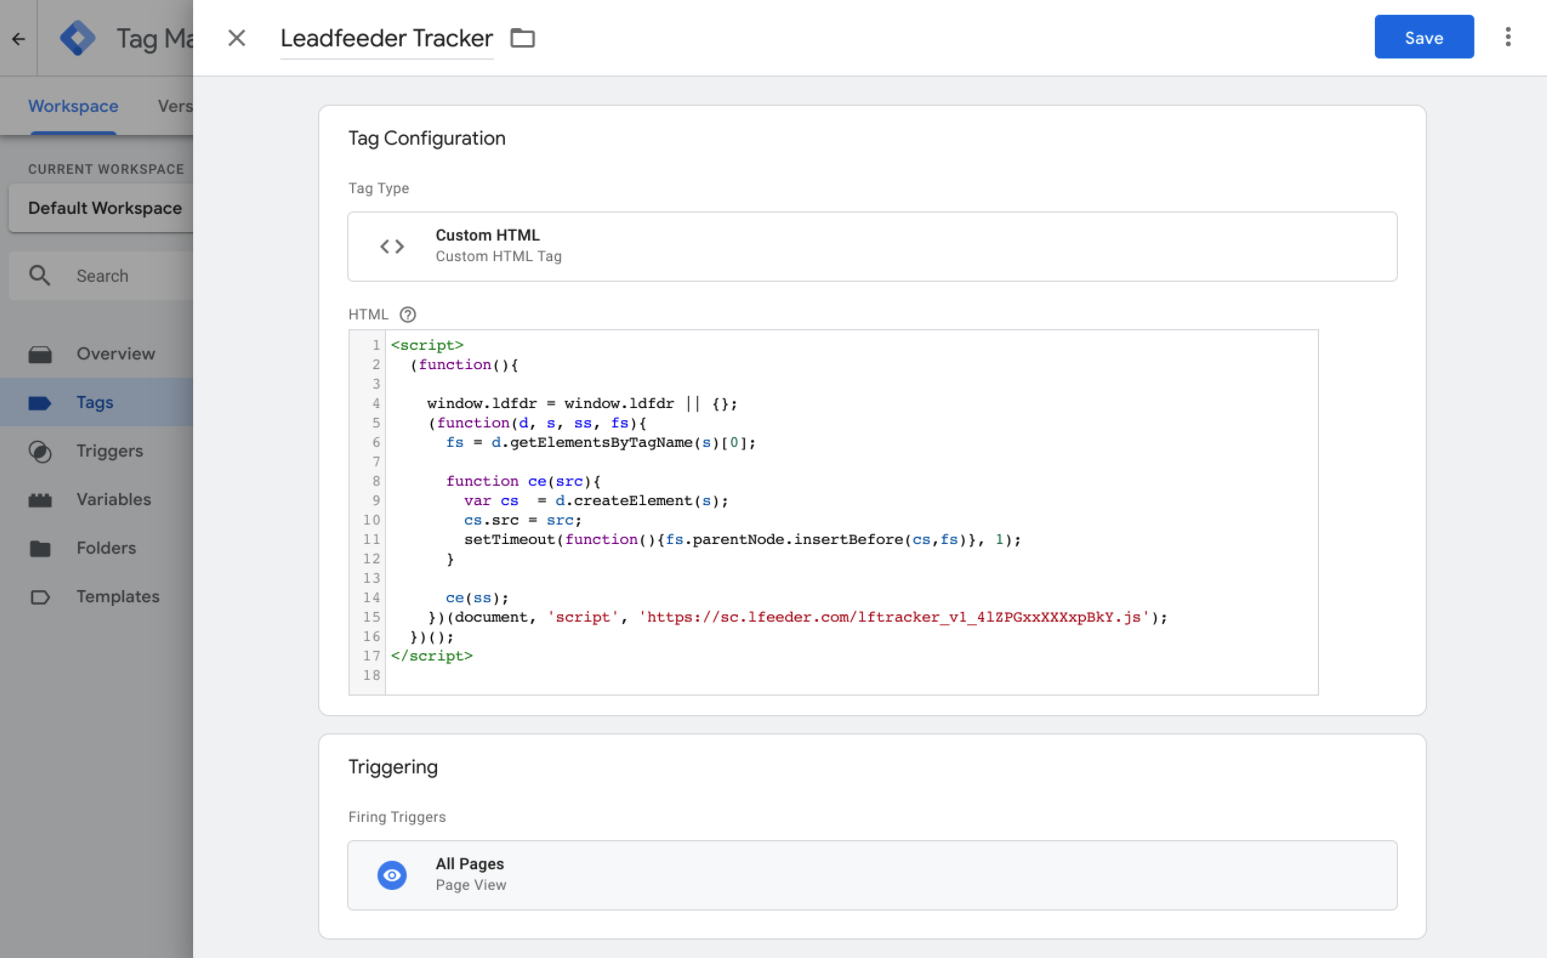
Tag Configuration > Custom HTML.
Copy and paste the Leadfeeder tracking code into the text box.
Triggering > All Pages.
Click Save in the top-right corner.
The tag configuration should look like this:
Image 4. tag
To complete the Leadfeeder Tracker setup, add *seidat.net to the hostname traffic rules in Leadfeeder settings. See "Hostname rules" in Leadfeeder's support article: https://help.leadfeeder.com/en/articles/3694748-how-do-i-use-the-leadfeeder-tracker-traffic-rules.
In most cases, the above steps will apply when installing other analytics tags. Most analytics providers publish their own guides about how to install their tracking code using GTM. Make sure to check the documentation for each respective product.
Read more about tags: https://support.google.com/tagmanager/answer/3281060?hl=en
Creating a custom trigger
Sometimes you might want to control which tags fire on certain pages. In GTM, triggers tell tags to fire based on pre-defined conditions. These steps describe how to create a trigger that fires only on Seidat pages:
Switch to the Workspace view by clicking Workspace near the top of the screen.
Click Triggers in the sidebar on the left.
Click New in the top-right corner.
Name the tag in the top-left corner (e.g. Seidat Page View).
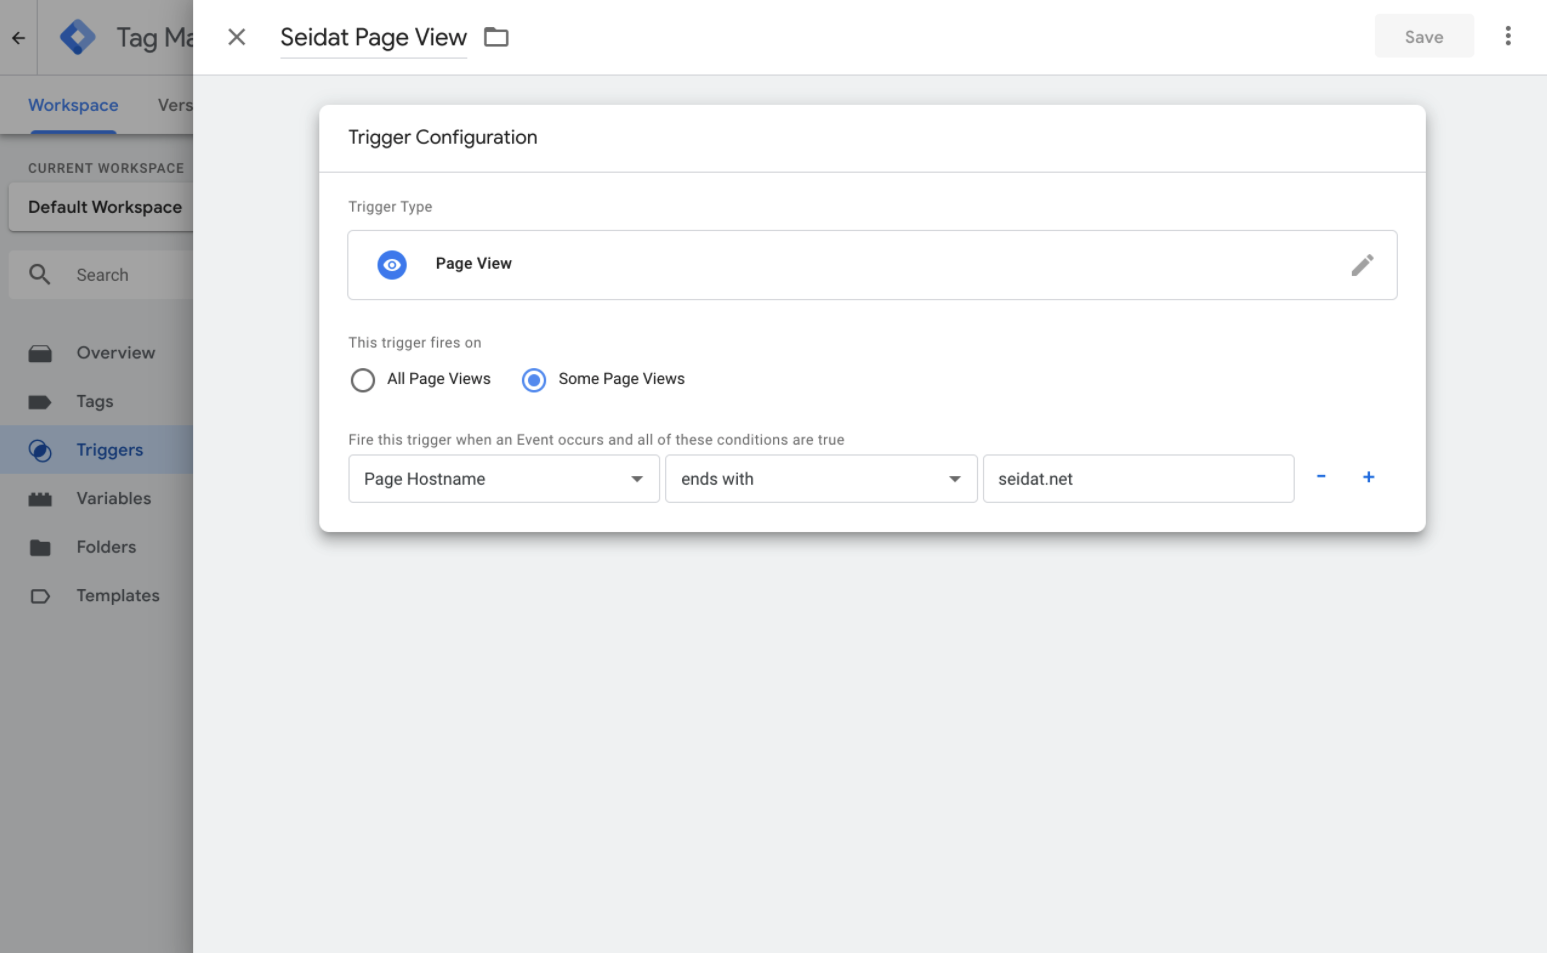
Trigger Configuration > Page View.
This tag fires on Some Page Views.
Select Page Hostname, ends with, type in
seidat.netClick Save in the top-right corner.
The trigger configuration should look like this:
Picture 5. Custom trigger
If you'd like to create a trigger that fires on every page other than Seidat, select does not end within step 7.
Once you've created the trigger, you can use it to fire GTM tags (step 7 in "Creating a custom trigger").
Read more about triggers: https://support.google.com/tagmanager/answer/7679316?hl=en
How it works
The GTM setup is sandboxed in a separate web page that's loaded as a child page inside Seidat and refreshed on every slide change. For security reasons, the page is hosted on its own domain: seidat.net. Every team has a dedicated subdomain to run their GTM container. The page path (what comes after seidat.net) matches the page path in the app. For example, page views from https://app.seidat.com/presentation/shared/FKY6TxTRuDmCeXZzX/0/0 will show as https://your_team_id.seidat.net/presentation/shared/FKY6TxTRuDmCeXZzX/0/0 in your analytics.
This design has several known limitations:
It's not possible to obtain the referrer URL.
Google Tag Manager’s Preview Mode doesn't work on Seidat pages.
Custom data layer variables
The following data layer variables are sent along with every page view:
slideTitle- Slide title.presentationTitle- Presentation title.slideId- Slide ID.presentationId- Presentation ID.userId- User ID. Only set if the visitor is logged in and is a member of the team that owns the presentation. Set tonullotherwise.
Read more about the data layer: https://support.google.com/tagmanager/answer/6164391?hl=en