
Multilingual collections and presentations

Your venue content is ready in every language your audience needs, with multilingual collections and presentations in Seidat.
Overview
A multilingual collection holds the same content — room names, descriptions, and URLs — in more than one language. You set the languages on the collection, and optionally on an individual presentation, so you can store and show your venue content in several languages without building a separate presentation for each one. When you present live, your viewer chooses which language they see.
This is ideal if you run venue tours for audiences who speak different languages, including tours you bring in from Visualizer: the languages travel with the content, so an imported tour keeps all of its languages instead of showing only one.
Setting languages on a collection
You choose a collection's languages once, and every piece of content in the collection can then be filled in for each of them.
1. Open the collection you want to make multilingual.
2. Edit the collectionby clicking on the pen icon next to its name and select "Enable multilingual" .
3. Add each language you want the collection to hold.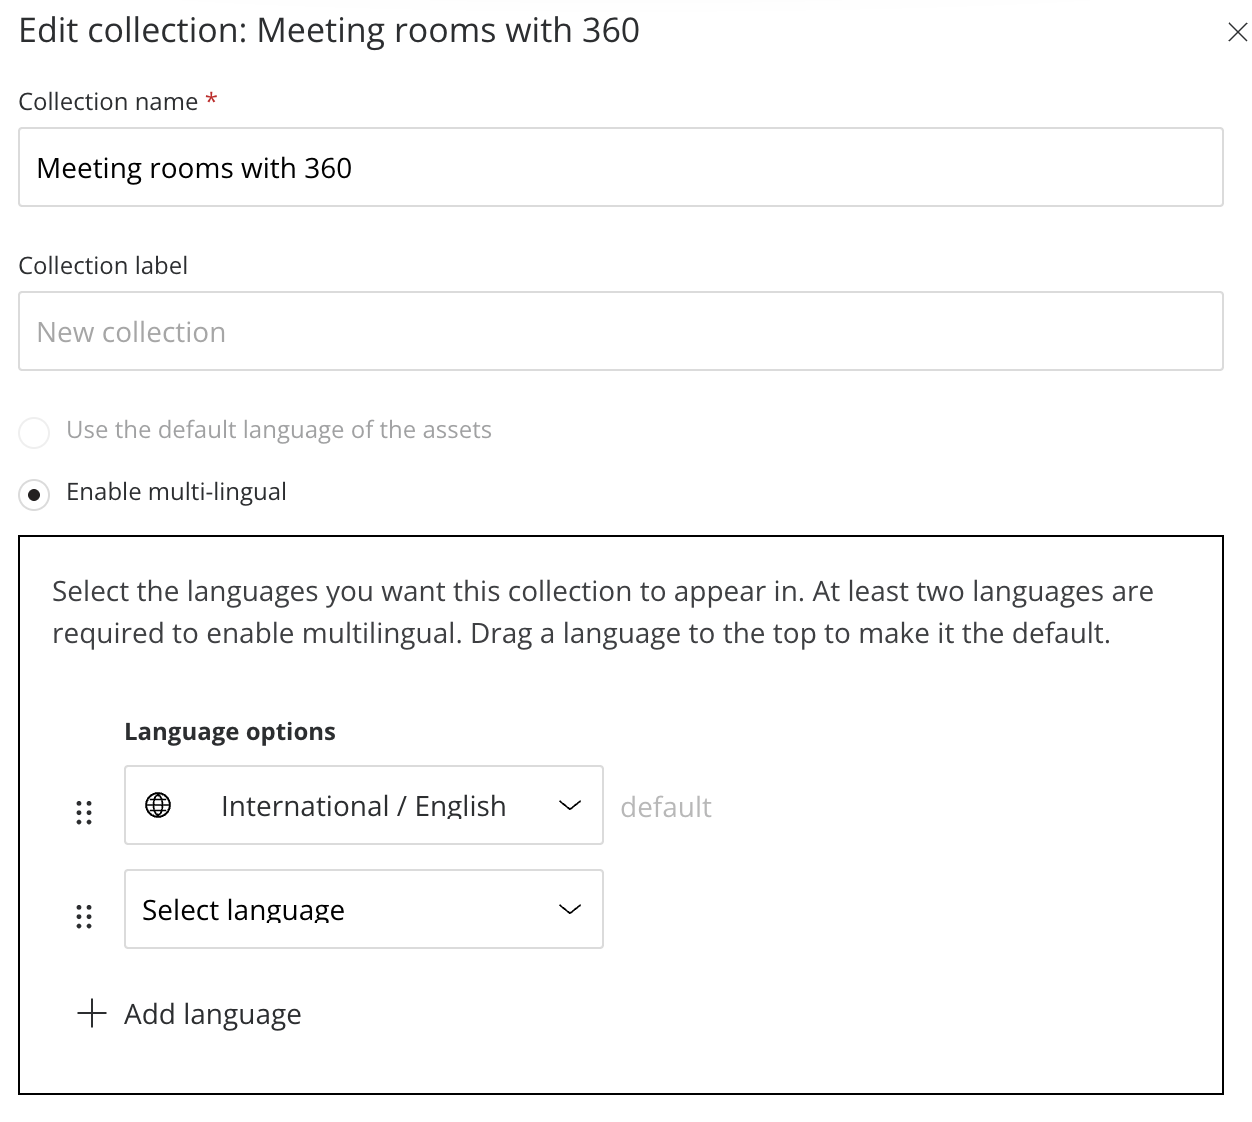
Adding content in each language
With the languages set, you fill in the translatable fields — room names, descriptions, and URLs — for each one.
1. Open the collection you want to translate.
2. Select the language you are want to edit from the drop-down menu.
3. Enter all the necessary information for that language.
4. Repeat for each language the collection holds.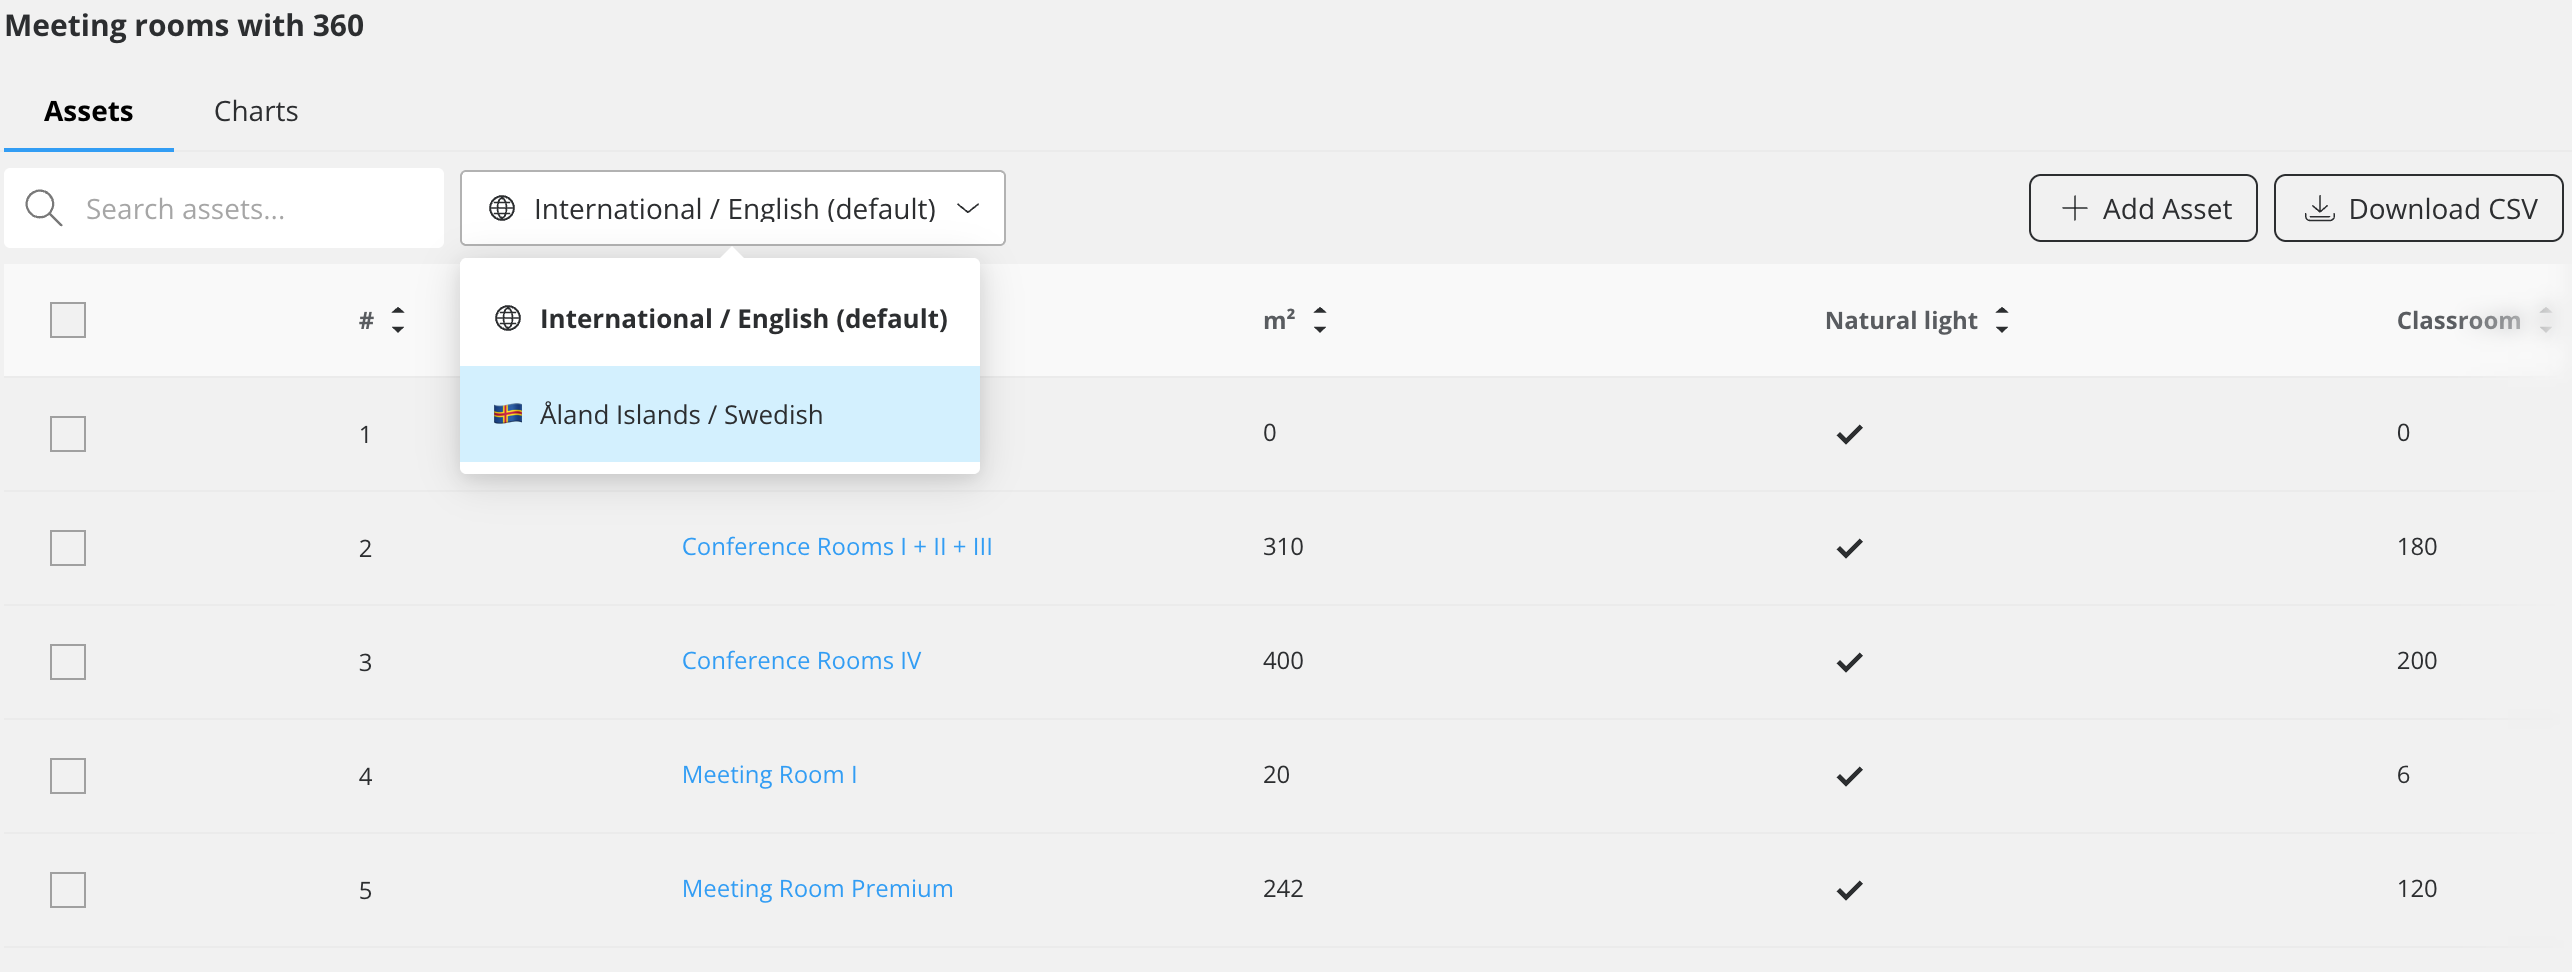
Important note: The languages belong to the collection, so a content item can appear in every language the collection has. Content you leave empty in a language shows nothing in that language, so fill in each field for every language you want your viewers to see.
Adding languages to a presentation
A presentation built from a multilingual collection can carry the same languages, so you can present the content live in any of them.
1. Open the presentation and its settings from the gear icon on the left bar
2. Click on "Enable multi-lingual presentation"
3. Add the languages you want to be available while presenting and give them a label that is visible in the presentation.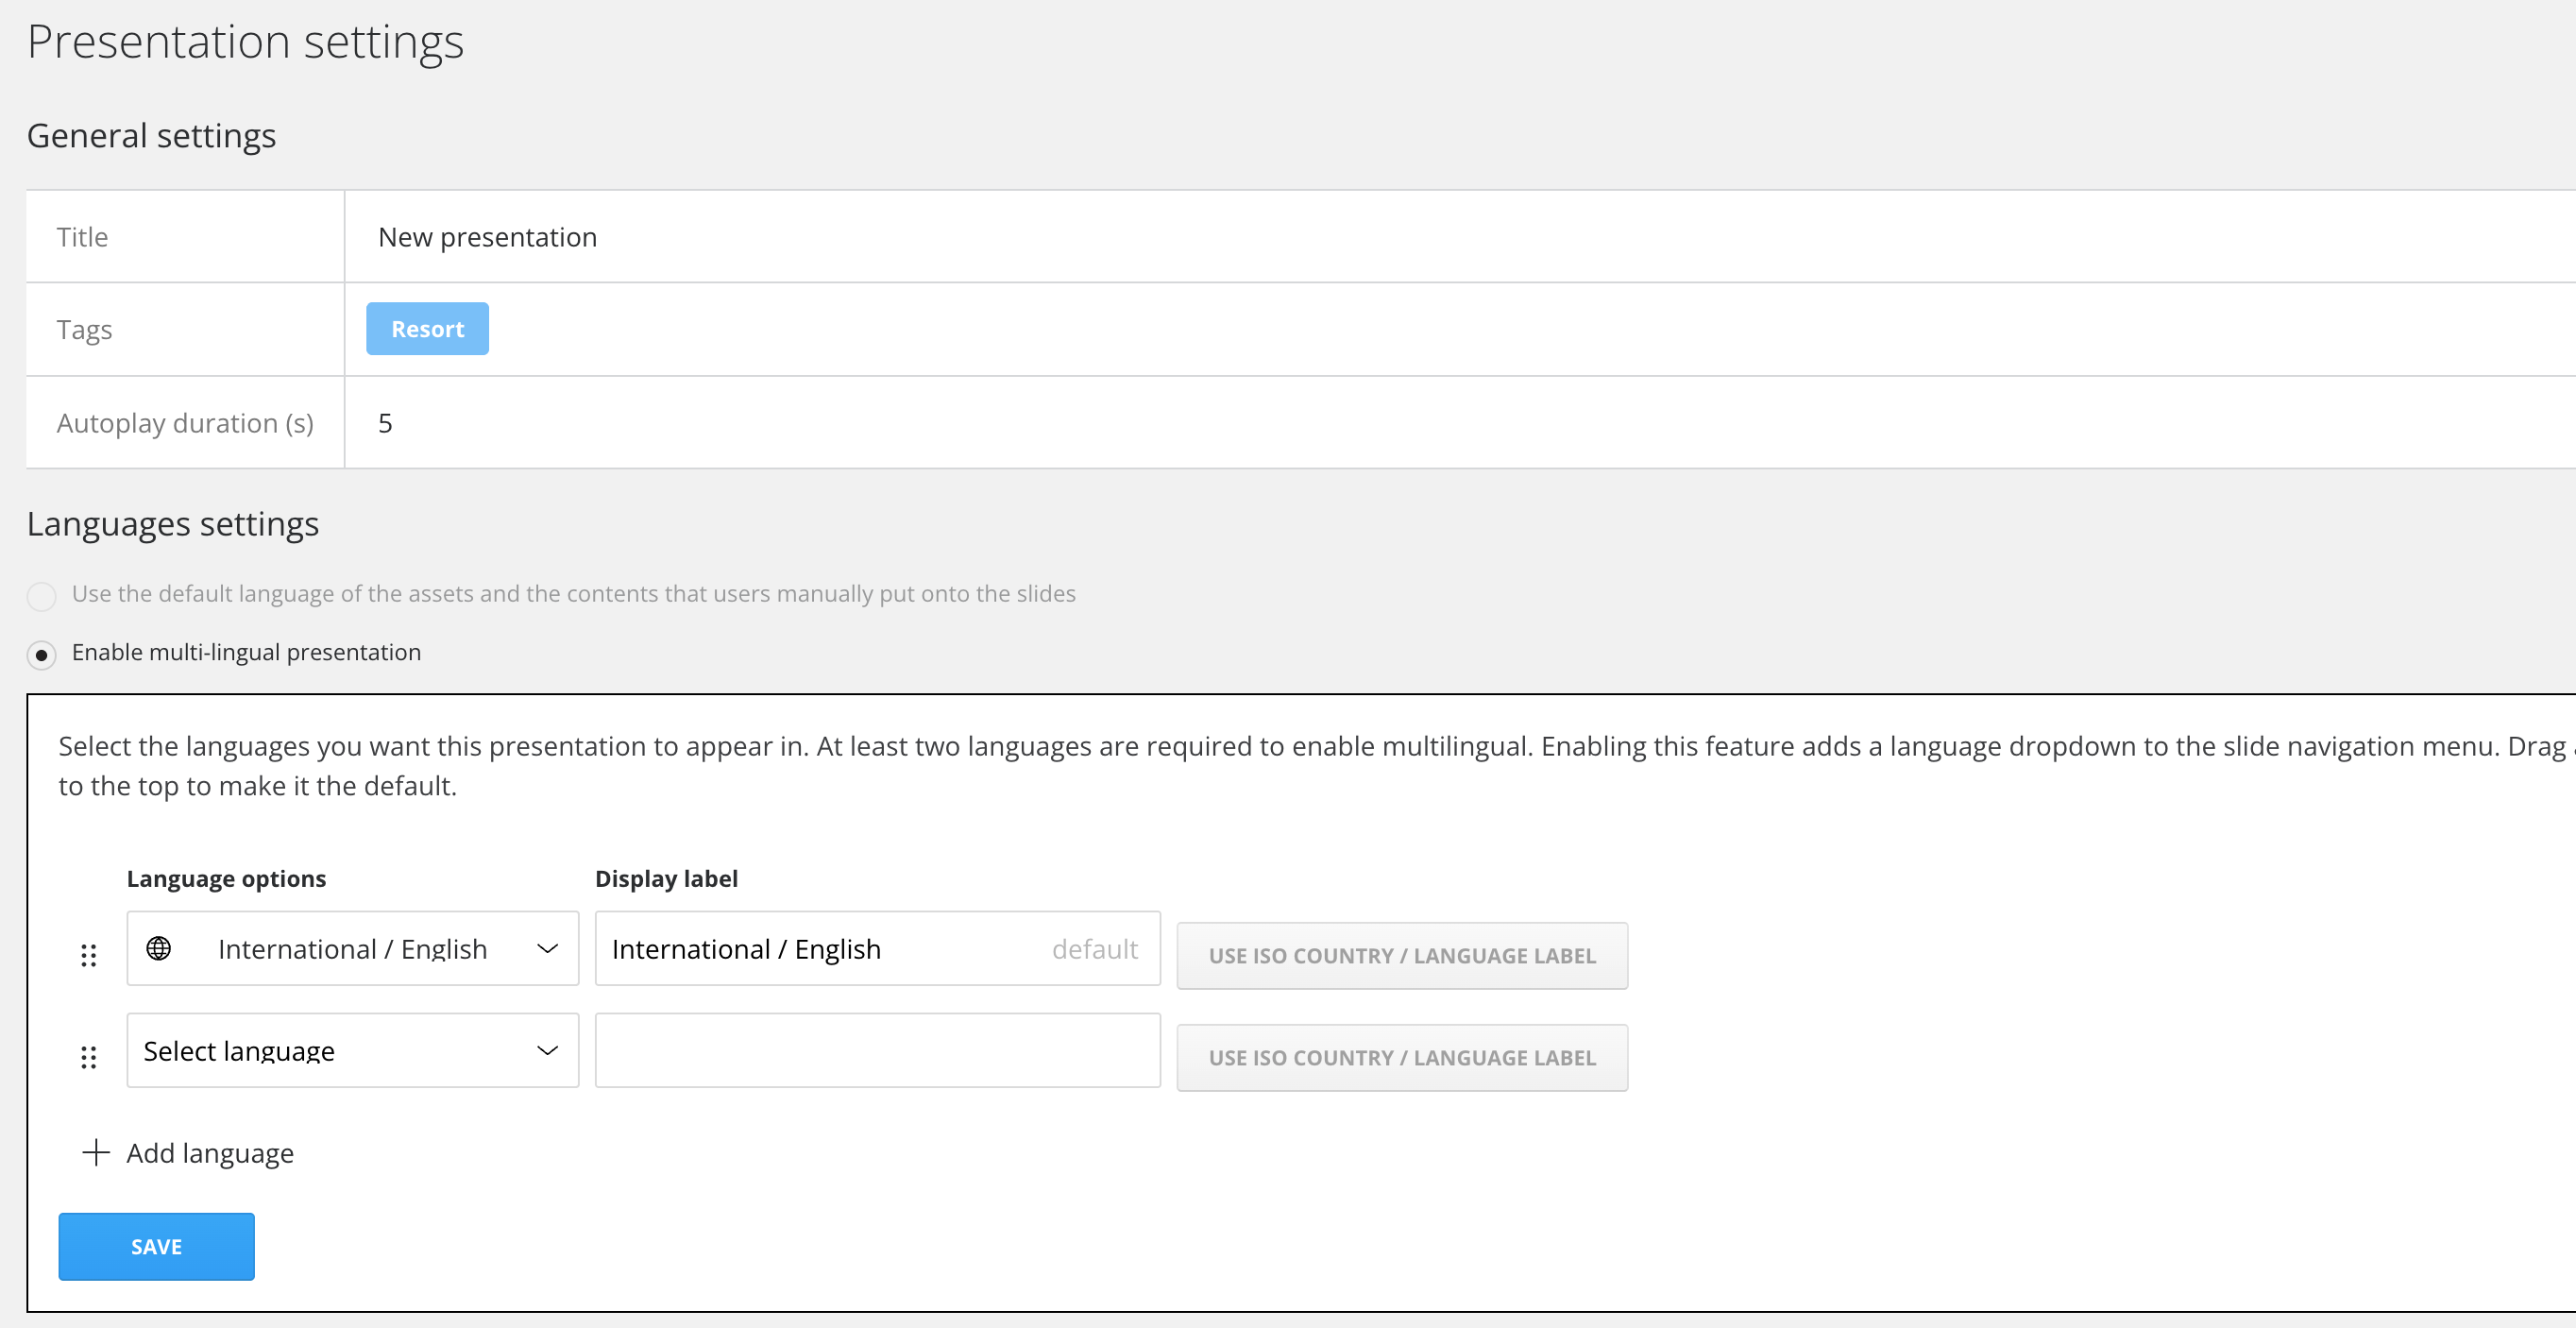
Switching language in a live presentation
While you present, your viewer picks the language they want, and the content updates to match.
1. Open the presentation in live view.
2. Choose a language from the language selector in the top right (the globe icon).
3. The room names, descriptions, and URLs update to the chosen language.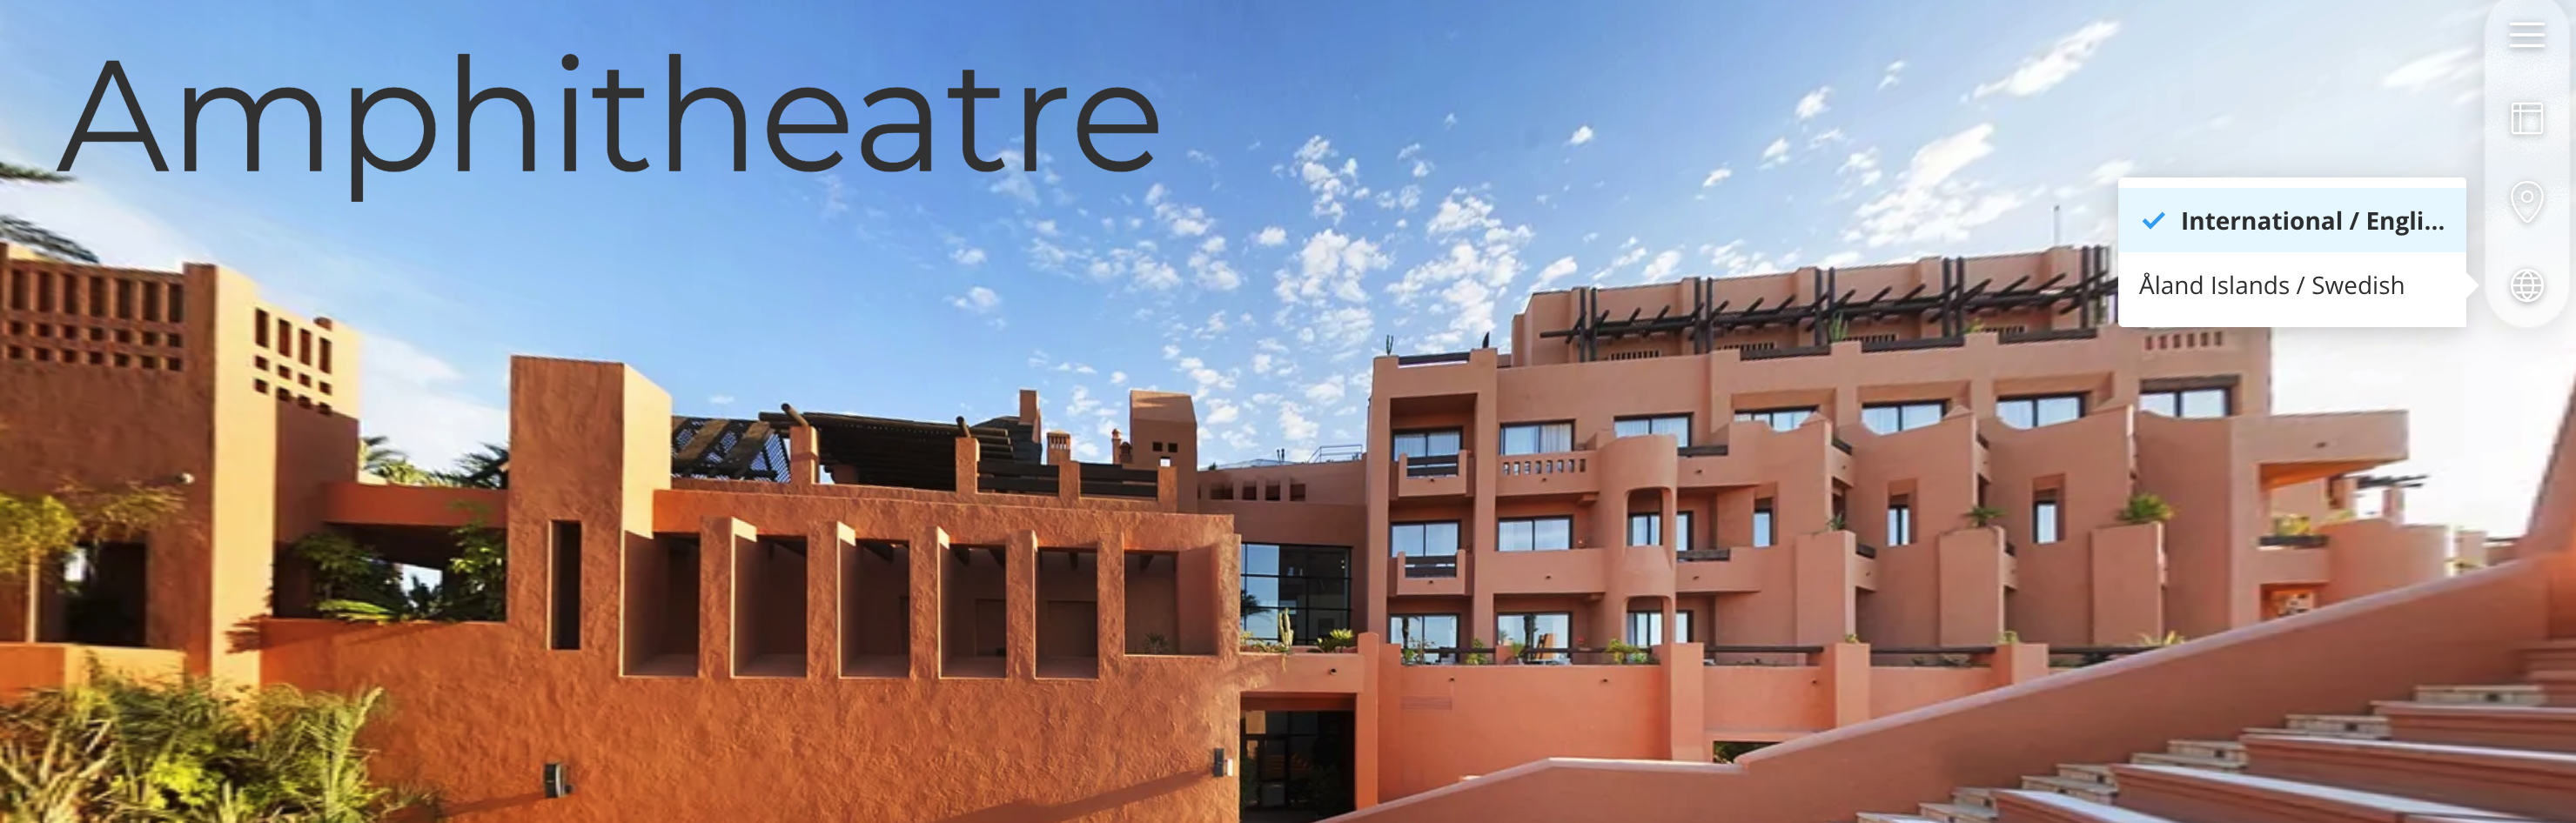
Important note: Switching language changes the content across the whole presentation, not just the slide you are on, so every smart slide follows the language your viewer selects.