Seidat Database
Database is a new feature in Seidat, which allows you to manage data in Seidat efficiently.
Seidat Database is a new feature in Seidat, which allows you to organize and manage data in a structured way from one place in the app. The database consists of collections, which can be used to categorize specific types of data. Each collection consists of assets that can be used in slides, allowing you to keep the information up-to-date. This feature is included in Plus packages and above.
Common Use Cases
Product catalog: Use product images with prices, descriptions, and availability status. When you update a price, it automatically updates across all your presentations.
Event Venues: Use venue photos with capacity, pricing, availability, and amenities. Perfect for event planners who need up-to-date information for client proposals.
Team directory: Maintain staff photos with contact information, roles, and office locations. Perfect for onboarding presentations or client introductions that stay current as your team changes.
etc.
COLLECTIONS PAGE
Creating Your First Collection
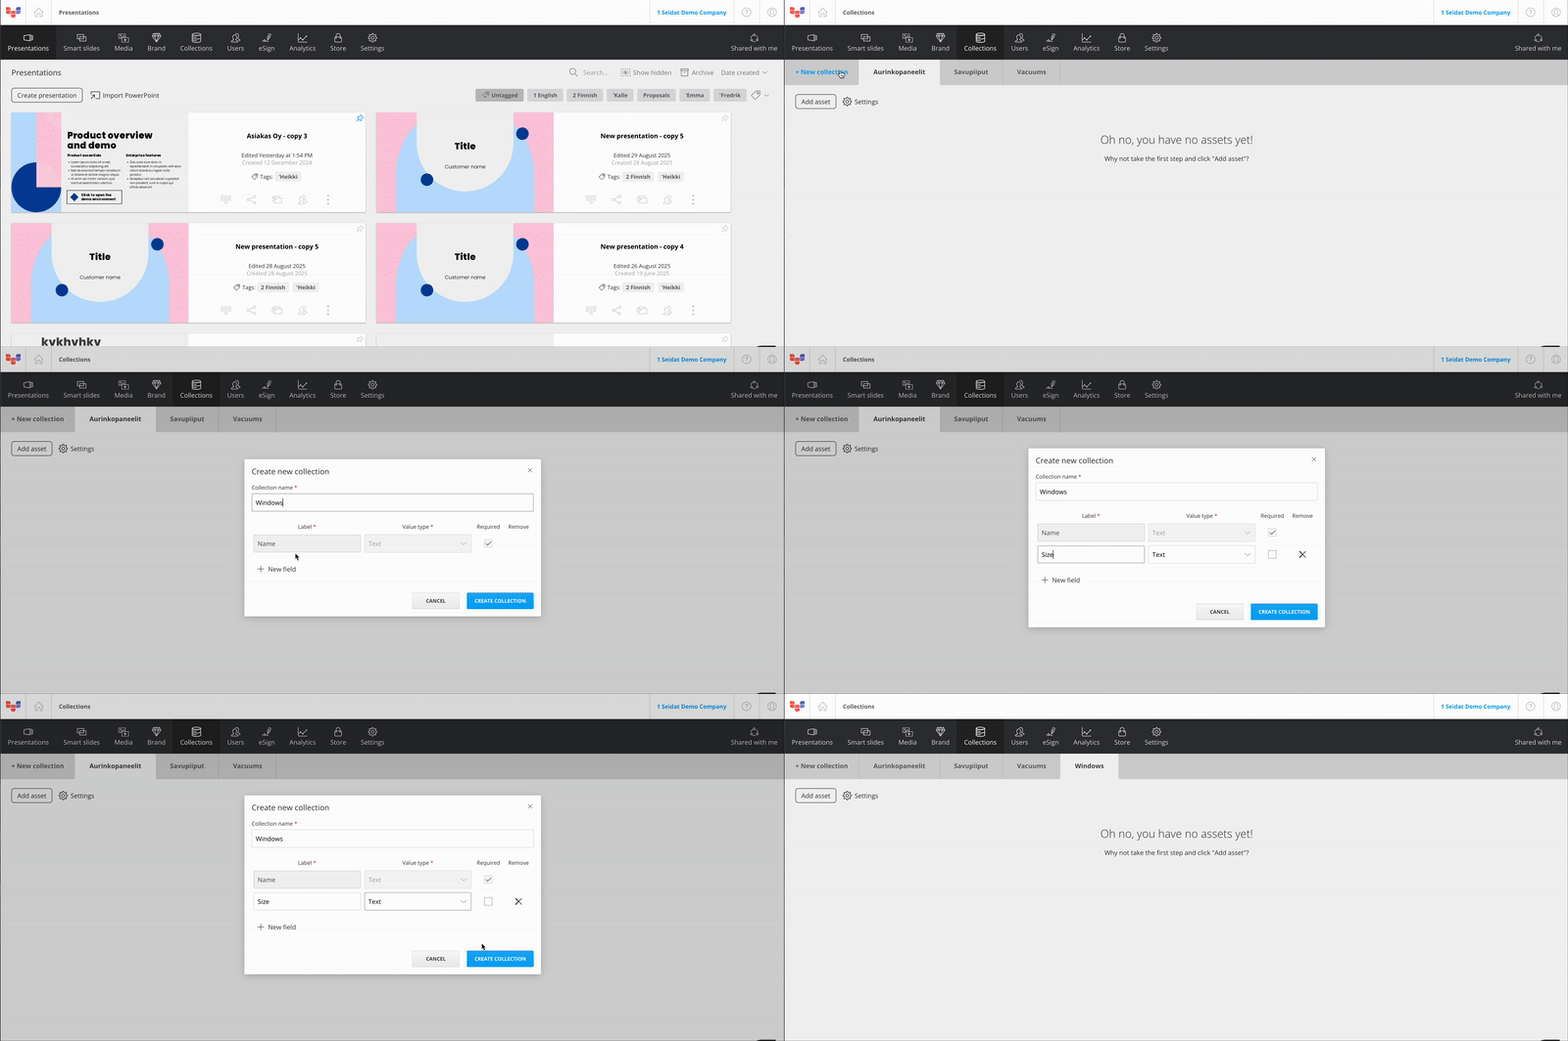
Navigate to the Collections section from the top panel (see gif 1.)
Click "+ New collection"
Give your collection a name and add custom fields to structure your data
“Name” is a required custom field that can’t be removed, ensuring that all assets have a common reference
Custom fields that can be created:
Text: any written information like names, descriptions, categories, or notes. You can type letters, numbers, and symbols.
Number: numeric data like prices, quantities, ratings, or measurements.
Boolean: yes/no flags
Media: images, videos, PDFs, and panoramas
Plan: images in which you want to add a marker
URLs: external links
Once field is created, you can only edit its label. You can’t change value type or its required flag. You can add more fields into collection or remove them at any point. 
(gif 1)
Adding Assets
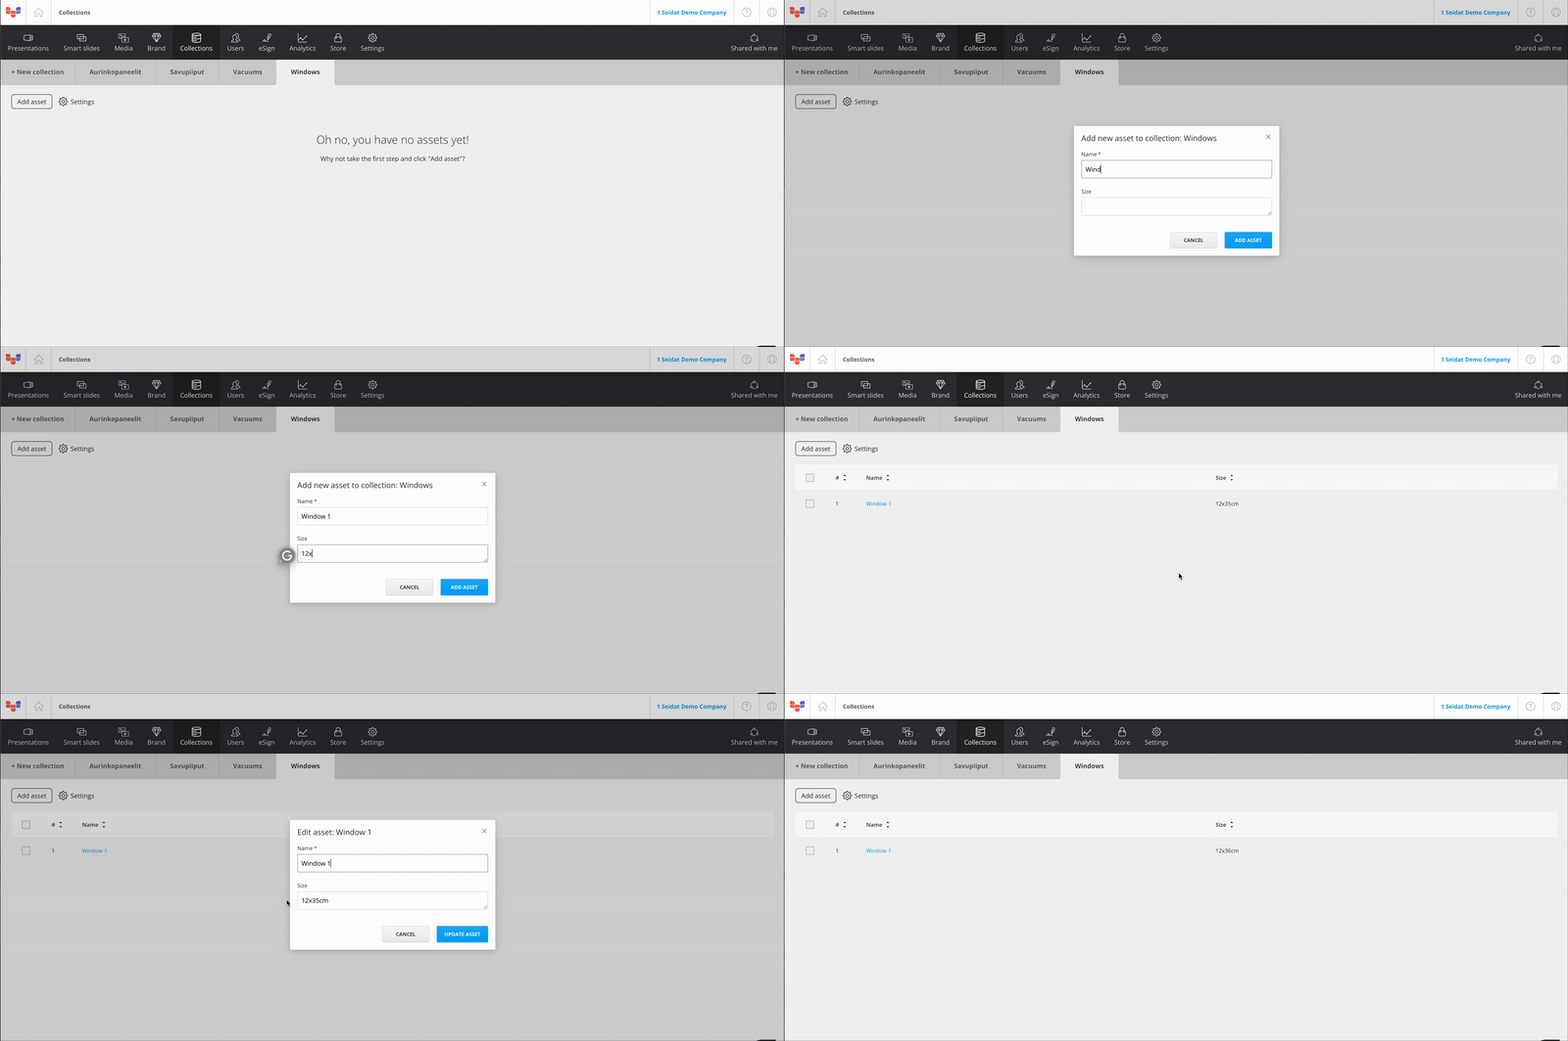
Click "Add asset" (see gif 2)
Fill in the data
In order to edit the asset, you can click on the asset's name.
If you delete media from the asset, the media bank will not be affected.

(gif 2)
Chart feature
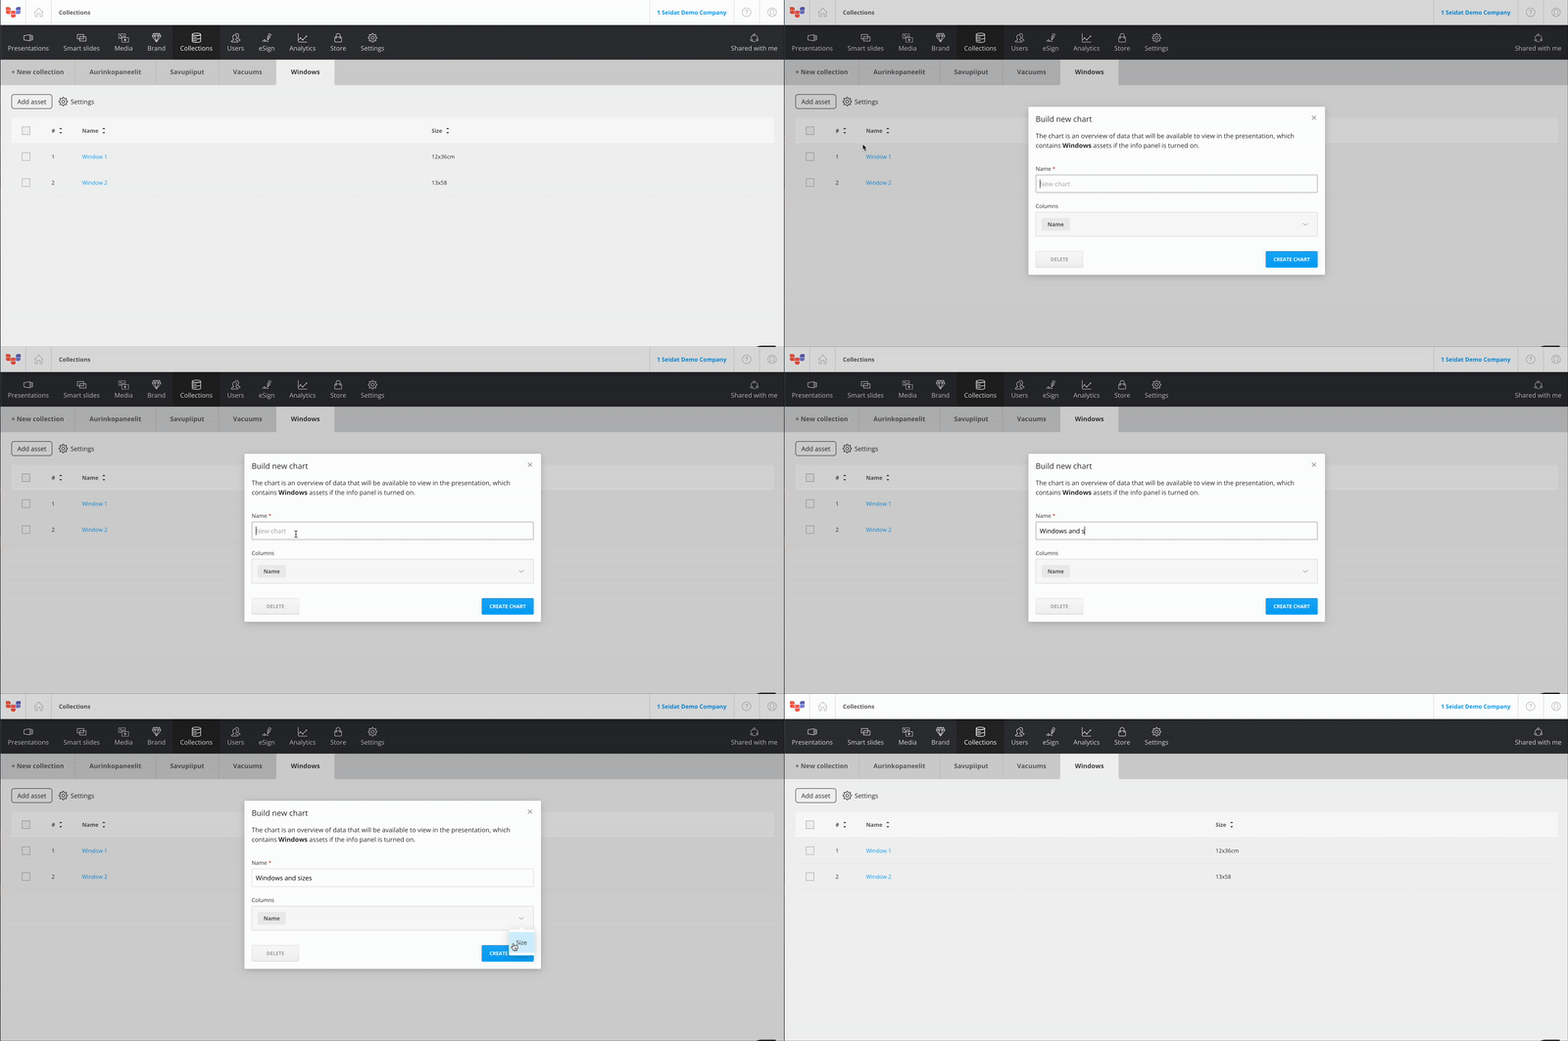
In settings, you can find an option to build a chart (see gif 3) . It means that you can select which fields can be displayed on the slide as a quick data overview. The chart can be accessed on the slide through the Info Panel menu. To see how the chart works in Play mode and how assets work as smart elements, read this support article.
(gif 3)
